Overview
The Web Application provides an intuitive user interface to make the job of updating the web site easy.
The Web Application allows you to easily access the dynamic aspects of your web site so that you can keep the content up-to-date without having to write web code or even publish changes to a web site. All you have to do is log into the system and make the change. Your users will immediately see the changes on-line.
- Login and Admin Settings
- Calendar Events
- Upload Featured Images, Thumbnails and PDFs
- Minutes/RSS Upload
- Add Minutes to the RSS File
- Backing Up The Database
Login and Admin Settings
To log into the web site, visit the URL http://www.your-domain-name.com/WebApp/Admin with your domain name in place of "your-domain-name.com
You will see the following login screen:
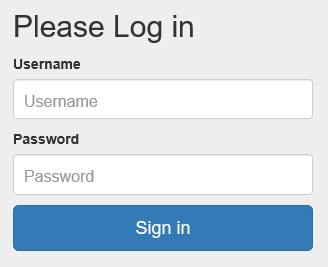
Enter your username and password and click on the Login button. Instead of pressing the Login button you can press the Enter key on your keyboard. Using the Enter key is a quicker way to use Web Application screens and is available on other screens within the application.
Once logged into the system, you will be a the "Home" screen of the Web Application, as shown below.
Edit the Calendar Events or Newsletters by selecting the appropriate Edit Option on the Home screen. At any point in the application, just click on the Home link in the menu bar to return to the Home screen.
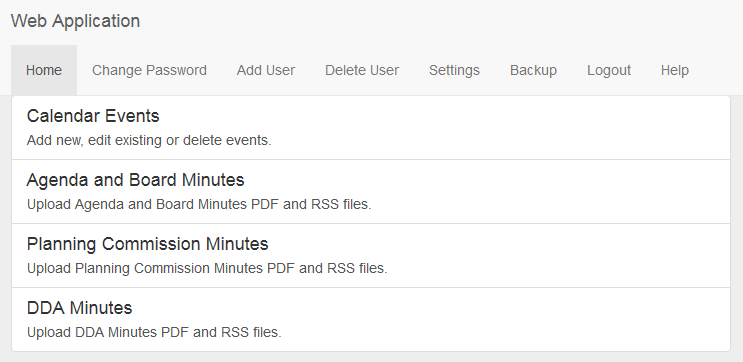
From the Home screen you can perform administrative functions and editing of the web site data. The administration features are displayed in the menu bar and include:
Changes the logged in user's password. The following screen is displayed:

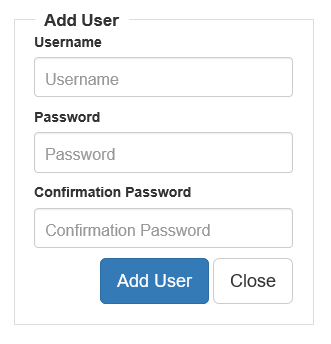
Adds another user that can log into the Web Application. The following screen is displayed:
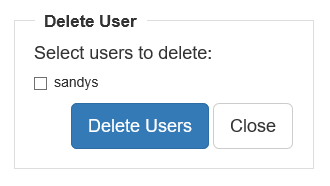
Deletes an existing user from the system. The following screen is displayed with all
users shown, except the currently logged in user. Select the users to be deleted and then press the Delete Users screen.
Changes company and contact information. Change the information and press the Close button. The
changes are made immediately and cannot be canceled.

Backs up a copy of the database to your local system. It is important to back up the database regularly. Please refer to the backup section below for more details. Backing up the Database
Logs out of the Web Application. Instead of just closing the browser, you should always select the Logout link.
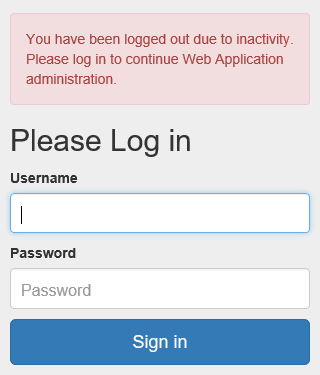
If you log into the Web Application and do not change anything for 10 to 20 minutes, the system will log you out. When you attempt to make another edit, the system will display the following screen.
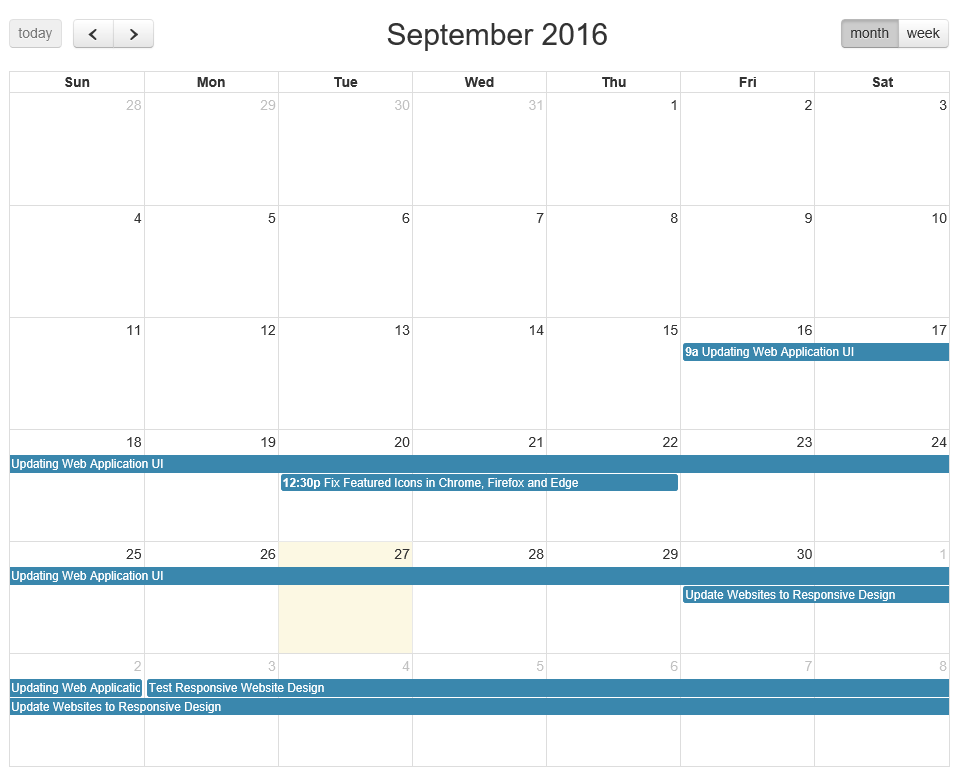
Calendar Events
To enter events that appear on the Calendar page and on the Home page of the web site, click on the Calendar Events link on the Home screen. This will display the Event List Screen similar to this example below.

From this page you can add, delete and edit calendar events. To add an event press the Add Event button. To delete an event press the Delete button for the event. To edit an event press the Edit button for the event. Events may be sorted by selecting the column header.
Adding a New Event
To add a new event to the calendar, press the Add Event button. This displays the following form.
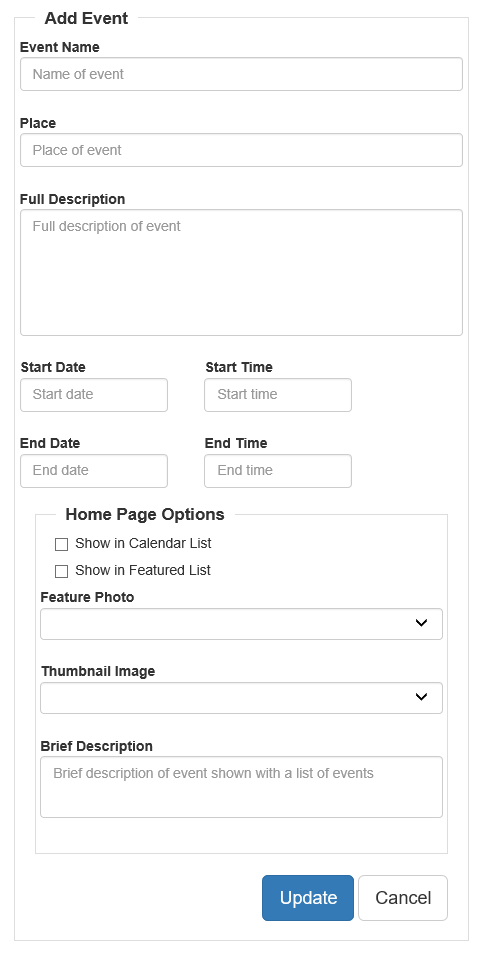
Fill in the fields for the Event. The only required field is the Event Name but the more information that is provided for the event the better the event is displayed on the website.
Featured Photos and Thumbnail images in the drop down lists of the dialog contain the images uploaded to the website. Refer to the Upload Featured Images, Thumbnails and PDFs section for details regarding the upload options.
To add a link in the description field that will go to a different website, use the following code:
<a target='_blank' href='https://www.otherwebsite.com'>Website Description</a>Referencing an Uploaded PDF File
To add a link to a PDF file that has been uploaded in the description field, use the following code:
<a target='_blank' href='MyFile'>My Description</a>Refer to the Upload Featured Images, Thumbnails and PDFs section for details regarding uploading PDF files.
Substitute the actual file name for "MyFile" and the description of the link for "My Description". Make sure that the file specified by "MyFile" is uploaded to the web site. If the file is published to a folder in the website, it needs to be included in the href reference. For example, the link for the membership application form may be:
<a target='_blank' href='https://www.your-domain-name.com/pdfs/MembershipApplication.pdf'>Membership Application Form</a>Adding Markup to the Description
You can also carefully use other HTML markup within the description field. To add a single line feed use the following tag.
<br>To add a double line feed use the following tags.
<br><br>To make item bold use the following tags.
<b>item</b>To make item bold use the following tags.
<em>item</em>To change the text color or background color refer to CSS Helper Classes.
Show in Calendar List
By selecting the Show in Calendar on the Home Page Options, the event will be shown on the Home page of your website if it has been configured to display calendar events.
Show in Featured List
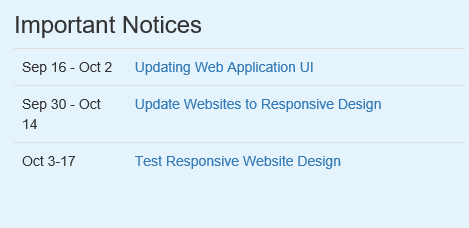
The format of the event on the home web page is shown below.

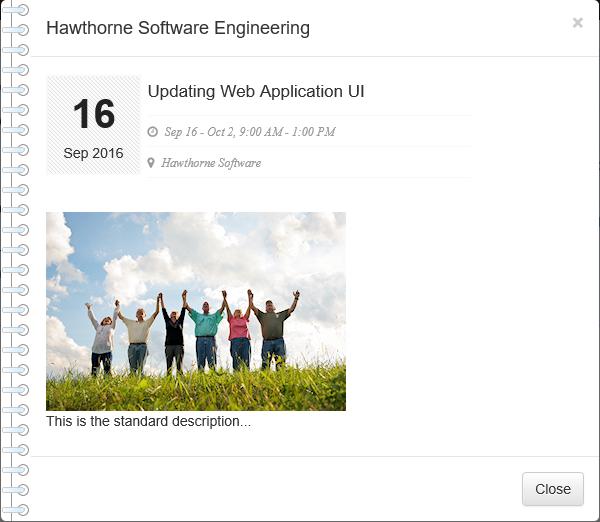
When a home page event or an event from the calendar is selected, the following window is displayed.
Full Calendar
A full calendar is also available for the site and if configured will look like this.
Editing an Existing Event
Edit an existing event to add more detail to the event or to reuse the event with an updated date. Once event dates pass they are no longer shown in lists of events. If you have events that occur on an annual basis, the event can be edited to reuse it for the next year.
Upload Featured Images, Thumbnails and PDFs
Uploading a featured image, thumbnail or PDF is very easy. The most important thing to remember for featured image and thumbnails is to use the specified image size.
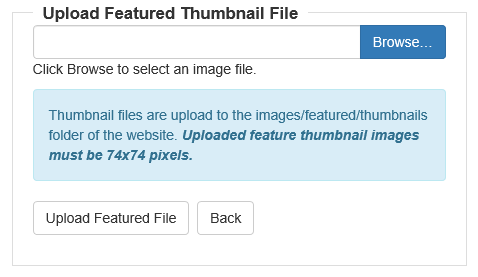
Upload Featured Image
Press the Featured Image button to upload an image that will be available for selection on the Add or Edit Event page. The Upload Featured Image page is shown below.

Press the Browse button to located the image file with the proper dimensions on your computer. After the file is selected, press the Upload Featured File button to upload the file to the server.
When the file successfully uploads to the server, you will see a confirmation.
Upload Thumbnail Image
Press the Featured Thumbnail button to upload an image that will be available for selection on the Add or Edit Event page. The Upload Featured Thumbnail page is shown below.
Press the Browse button to located the image thumbnail file with the proper dimensions on your computer. After the file is selected, press the Upload Featured File button to upload the file to the server.
When the file successfully uploads to the server, you will see a confirmation.
Upload PDF
Press the PDF File button to upload a PDF file that will be available as a link within the website. The Upload Featured Thumbnail page is shown below.
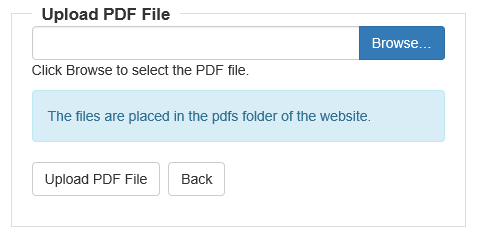
Press the Browse button to located the PDF file on your computer. After the file is selected, press the Upload PDF File button to upload the file to the server.
When the file successfully uploads to the server, you will see a confirmation.
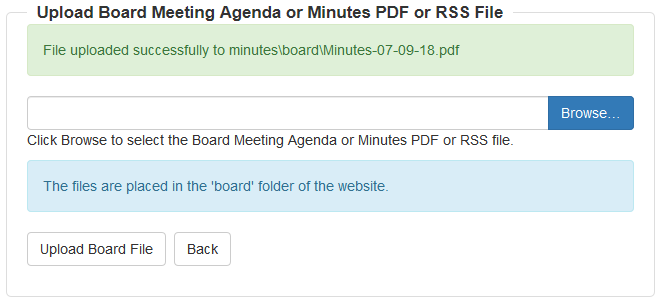
Minutes/RSS Upload
Upload minutes PDF files or the minutes RSS file by selecting Minutes on the Home page. The following screen is displayed. (This example is for Board Minutes.)
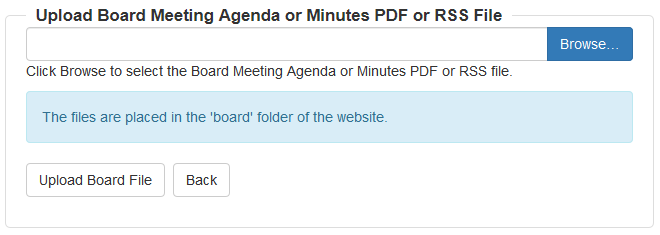
Press the Browse button to located the minutes PDF file or the minutes RSS file that is on your computer. After the file is selected, press the Upload File button to upload the file to the server.
When the file successfully uploads to the server, you will see a confirmation similar to the following.
After uploading the Minutes PDF and RSS files, press the Back button to return to the Home page.
Add Minutes to the RSS File
Minutes will need to be added to the existing RSS files and the RSS files must be uploaded (see the previous section) in order to see
these LIVE on the Minutes web pages. To add a new minutes PDF to the list, copy an item,
i.e. shown below in the highlighted section, and
update the content of each section. Take extreme care when updating the <pubDate> section since the date must be in the
exact format.
<?xml version="1.0" encoding="UTF-8" ?>
<rss version="2.0">
<channel>

<title>Hawthorne Software Minutes</title>
<link>http://www.hawthornesoftware.com/minutes.html</link>
<language>en-us</language>
<copyright>℗ & © 2016 Hawthorne Software</copyright>
<description>Hawthorne Software Minutes and RSS Feed</description>

<item>
<title>Regular Council Meeting</title>
<link>http://www.hawthornesoftware.com/newsletters/2016-November-Newsletter.pdf</link>
<description>Information about the Web Application </description>
<pubDate>Tue, 24 Jul 2018 15:00:00 GMT</pubDate>
</item>

</channel>
</rss>Backing Up The Database
Backing up the database to a local computer is very important. Since all the data is stored in the database on the server, if anything should happen to the server or the database is compromised in any way, not having a backup would require that the data be enter from scratch which would be a long, tedious and error prone task.
To backup the database click on the Backup link on the menu bar. This will start the backup process by presenting the following dialog.
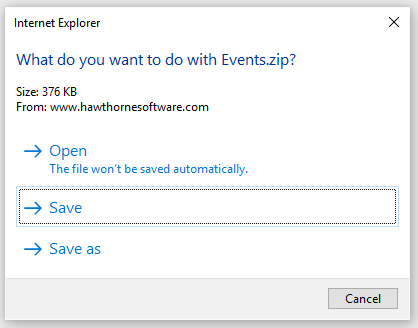
Press the Save button which will prompt you to save the data on your local file system. The save options are browser specific but the file is typically saved in a download folder.

To restore a database with a backed up version, contact Hawthorne Software and provide the latest backup Events.zip file.